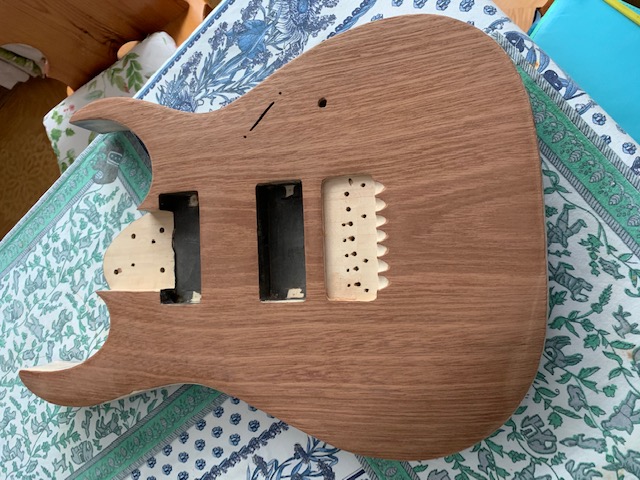
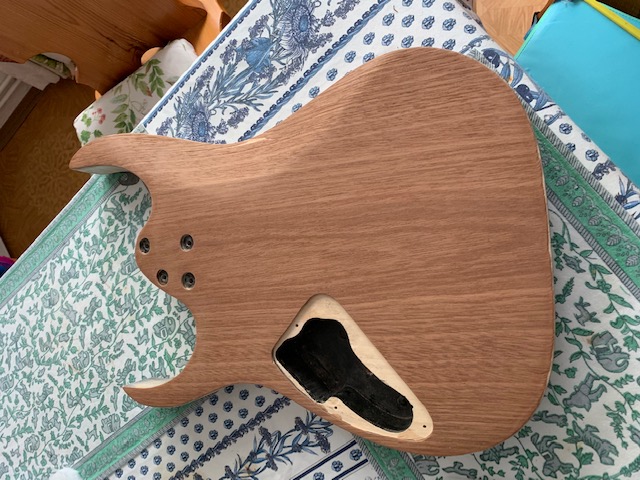
It is with pleasure that we share today Kris Klima’s guitar body project.
Kris applied a new skin to his guitar and kindly shared with us his experience and feedback of using the Roarockit Luthier Thin Air Press Kit.
Hi,
I’m Kris and what you’re looking at is an Ibanez GRG7221 body with a Khaya veneer applied using the Roarockit Luthier press kit.

I play guitar and I always wanted to try a couple of ideas so I bought a ‘pre-owned’ budget instrument that a) I would not hesitate to tinker with, b) would not regret if things go wrong, c) I would be comfortable playing if everything goes according to plan.
After watching a crapload of luthier videos (esp. Crimson Guitars and Will’s Easy Guitar channels), I decided to take it to another level. I bought some veneer (thanks to the Wood Veneer Hub for advice and arranging shipping), glue, and went searching for a vacuum press. After a while, I discovered Roarockit Skateboard and thought… OK, if that press is strong enough to bend seven layers of Canadian maple into shape, it must be enough to cold press veneer onto a guitar body. So I ordered one.
And… it worked!
Let me share a couple of dos and don’ts so you avoid mistakes that I made.
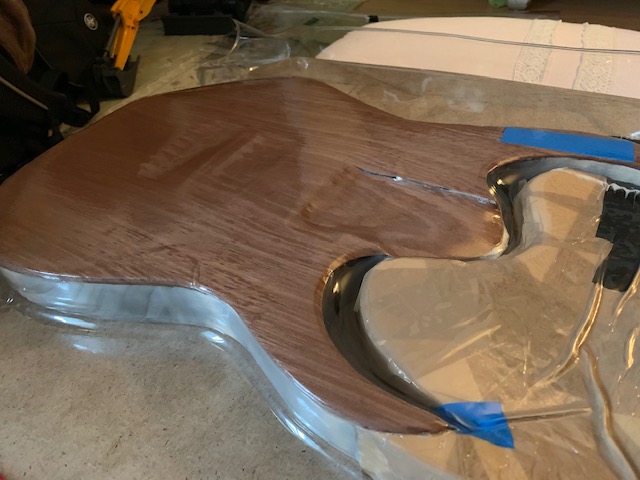
Flip the bag upside-down.
- You may need to use a small rubber roller to get the air bubbles out, especially on guitars that do not have flat bodies. You can’t do that with the valve and the net on top of your project.
- To support the upside-down bag, I used a box from an LCD monitor with a hole cut in the middle for the valve.

Use flat support for the guitar body – a thin MDF would do
- This will help with stability when you are putting the guitar in the bag. There’s not too much space left and with an MDF board, it would be like putting the guitar inside on a tray. You may fix the body to the plank using a double sided tape
- Round the edges of the plank – I used a router but some quick sanding or rasping would do too
Fill in the cavities
- Typically, you cut out the holes for pickup cavities in the veneer after application. However, veneer will crack around sharp and deep edges under pressure and some cracks might extend to the actual body area. I used foam that usually comes in boxes with electronics – cut to size to fill up pickup cavities, the neck joint and the electronics cavity on the backside. Ensure the foam does not protrude but it doesn’t have to be leveled, I went with about 3 mm below the surface.
- I also constructed a large counterpiece to fit in the space around the horns. I actually punctured one Roarockit bag on the sharp pointy end of one of the horns. Having something in between the horns will not affect the pressure in the areas where you need it, but will ease/prevent the bending of the bag over critical areas. That ugly thing that you see is a crudely shaped polystyrene block wrapped in a packing tape. Crude but effective.
Cut the veneer as close to the shape as possible
- You may end up with ugly veneer patches glued to the sides of the guitar. You can get rid of them (using a scalpel knife, roller sander etc) but it’s an extra effort and not an easy one
- Or you’ll be left with bits and pieces cracking and sticking out, then cracking under increasing pressure. Those cracks can spread to where you don’t want them to be.
Use a vacuum cleaner in the initial phase of the operation
- This is important especially on guitars with curved surface (or that belly cut-out on superstrats).
- Veneer will bend – but the longer it takes, the higher the chance it will crack and that the splinter will move from its original location. It happened to me. Had I used a hoover, the veneer would have still cracked as the cutout is huge and deep, but it would not have moved 30 degrees off – quick depressurization would keep it in place.

Go slow, think things through, and then slow down further. And have fun :)s
LinkedIn profile (https://www.linkedin.com/in/kristianklima/ )
Thanks Kris for your feedback and sharing in detail your experience with us.
